Automatically send invoices to your customers
Click on Email Settings in the left menu bar of our application & click on Automatic Invoices tab on this page. You’ll see a few settings that look like this -

Automatic Invoices - Customers
Click the ‘Enable’ button in the card labelled ‘Automatic Invoices to customers is disabled’. When this is enabled, Invoice Falcon will automatically generate and send invoices for all orders that are placed on your store.
If you want to send all your automatic invoices with a Stripe payment link, click the ‘Enable’ button for the card with the text ‘Payment links in automatic invoices to customers is disabled’. Please note that this requires an Ultimate subscription and a Stripe account.

Send automatically to specific customers only
After enabling Automatic Invoices to customers, you can also choose to send invoices automatically only to customers that have a specific tag. When we receive the order details from Shopify, we’ll check if the customer placing the order has a tag mentioned in the field here. If the customer has the tag, the invoice will be sent to them. An invoice will not be sent to any customer that does not have a tag mentioned in this field.
To save a list of tags, you can enter it in the field like this - b2b, custom, wholesale

Send automatically to orders with specific status only
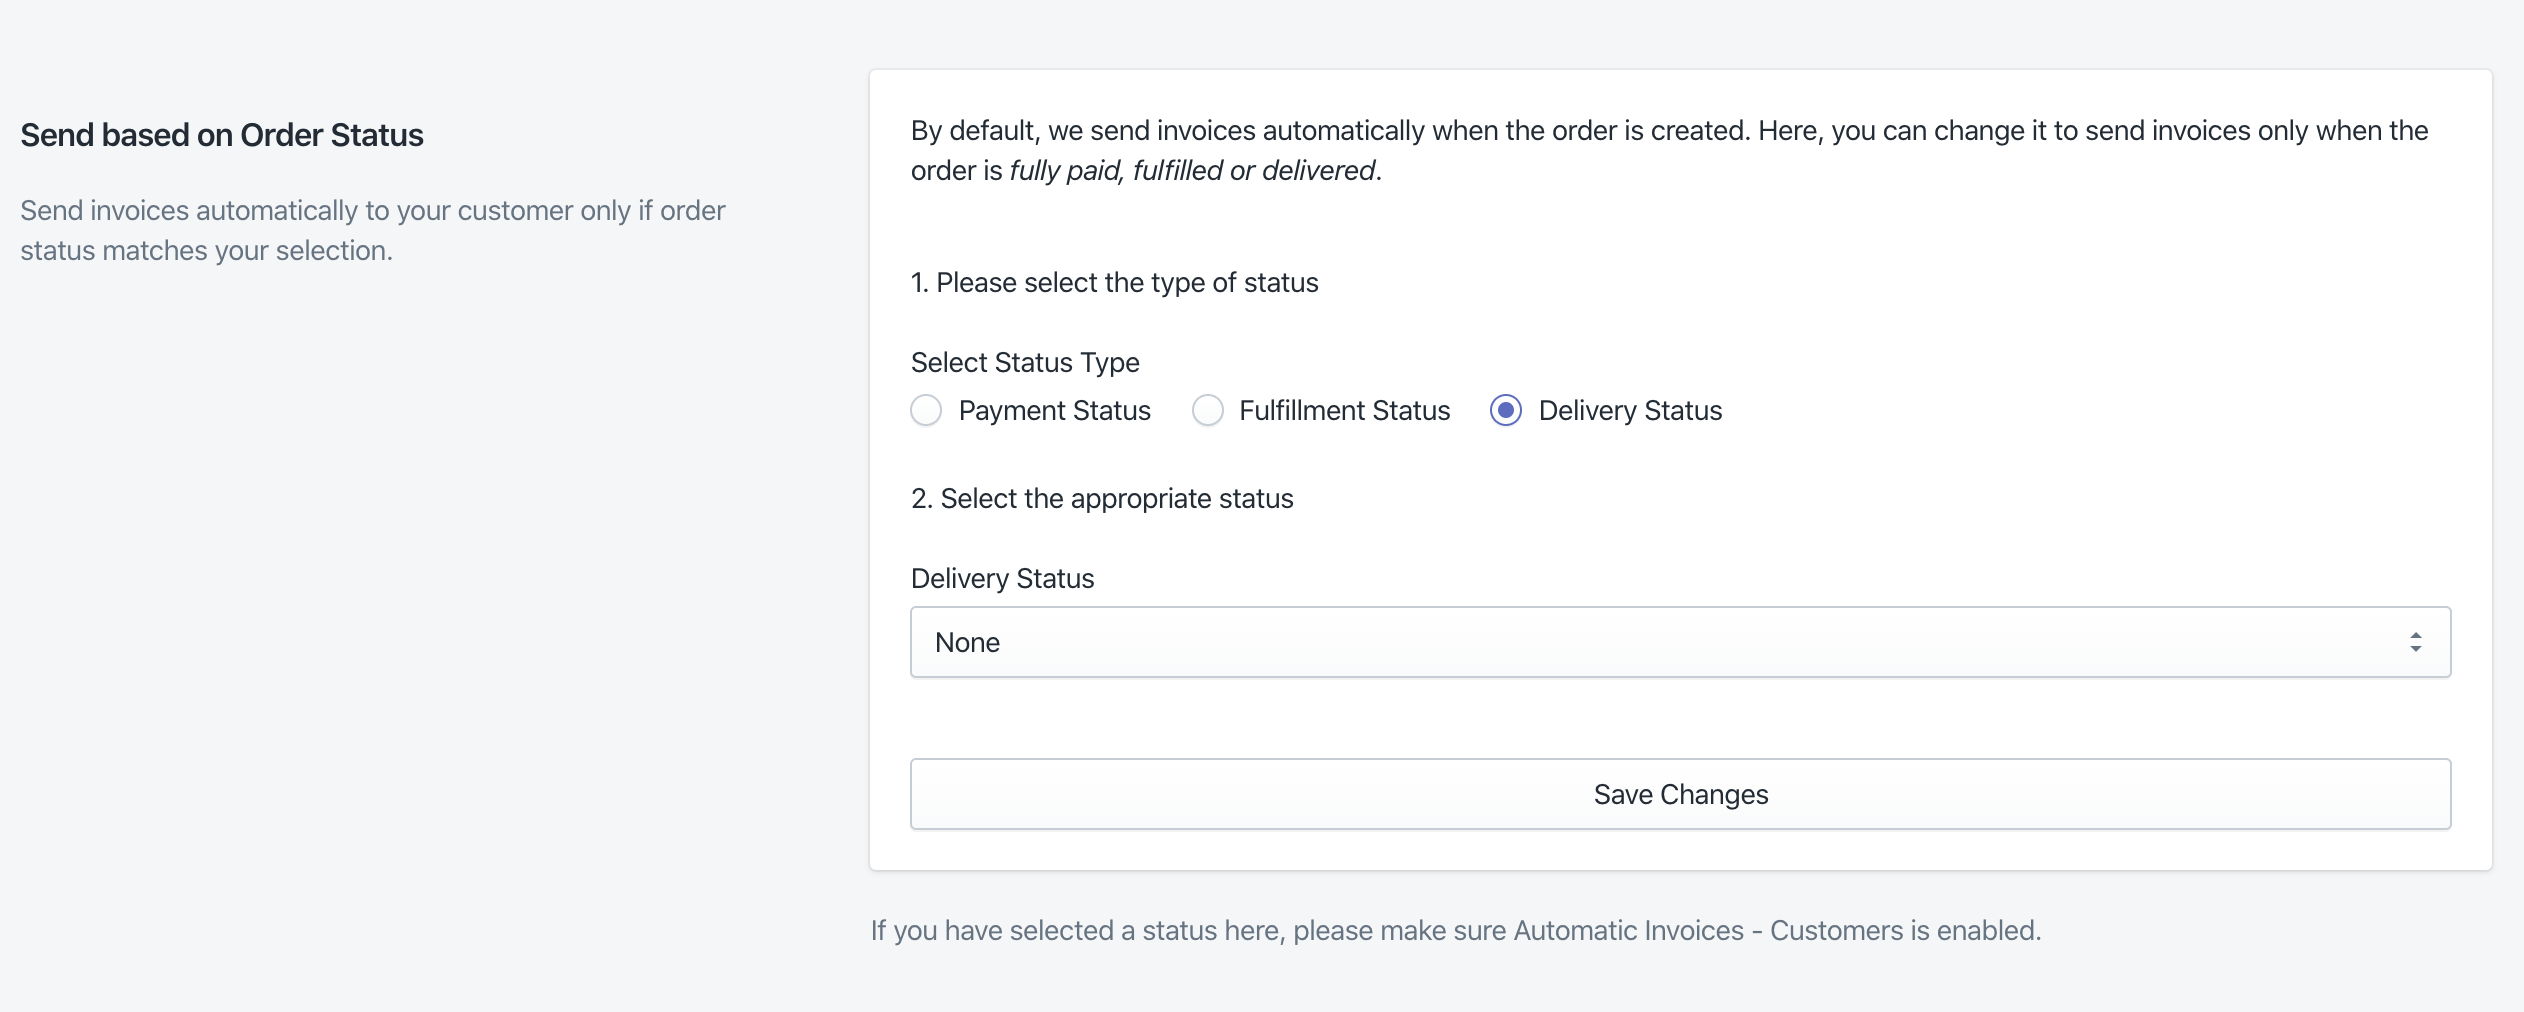
After enabling Automatic Invoices to customers, you can also choose to send invoices automatically only for orders that have a specific payment, fulfilment or delivery status. For example, you can choose to send invoices automatically only for orders that are fully paid, fulfilled or delivered.
To set this up -
- Select the type of status on which you’d like to send the invoice automatically. You can choose between payment, fulfilment and delivery statuses.
- Next, select the appropriate status that you’d like to send it on. For example, if you’d like to send the invoice only when order is fully paid, select ‘Order is fully paid’ in the dropdown.
- Click ‘Save Changes’ after you’re done. :)