Change or remove your store's address in the invoice
In Invoice Falcon, we automatically pick up your store’s address and other important details when you first sign up to use our application. These details are shown to your customer in the ‘Supplier Address’ section of the invoice. In this article, we’ll guide you through how you can change or remove these address details.
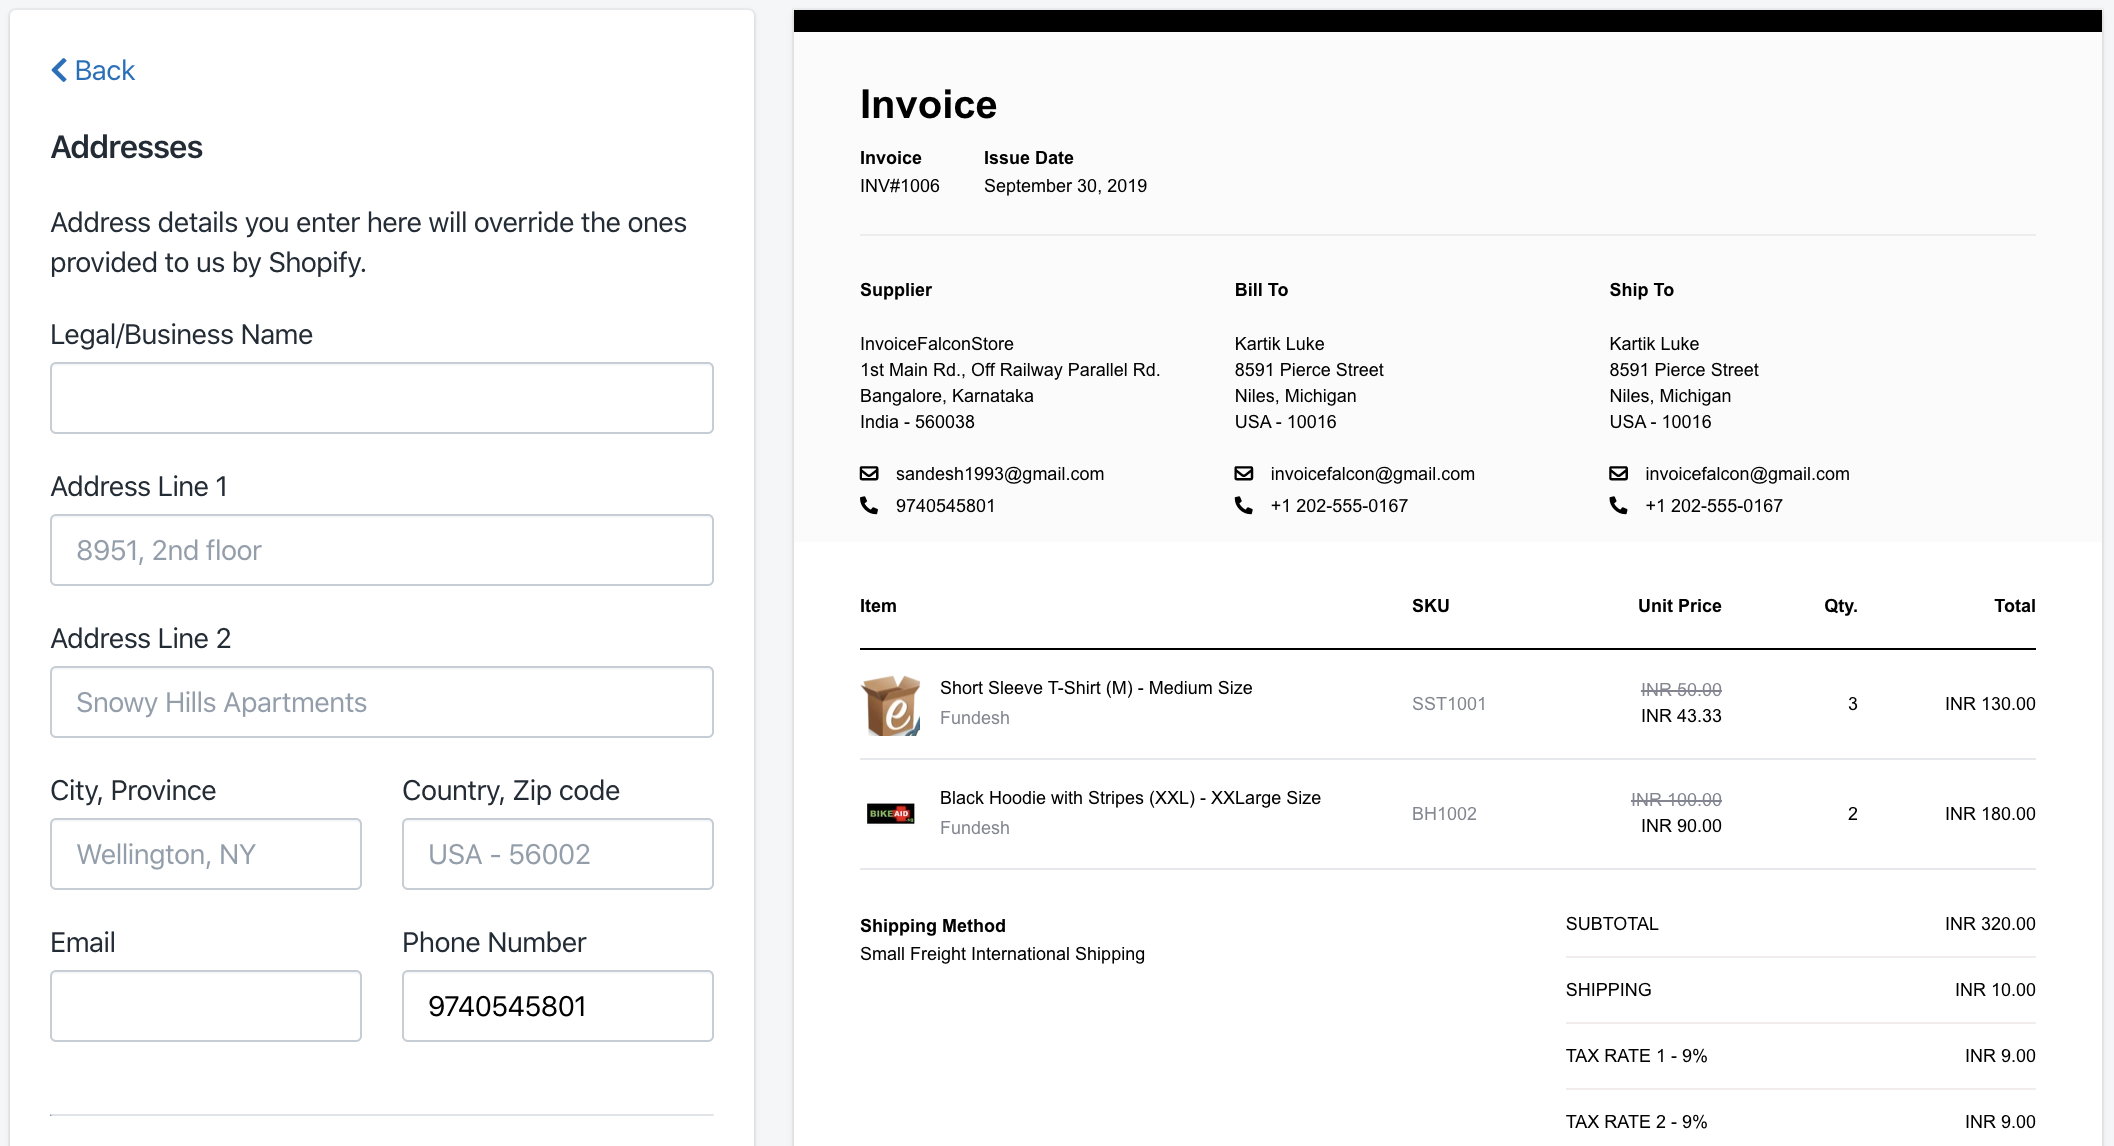
Click on Invoice Design in the left menu bar of our application & click on Supplier, Shipping & Billing Addresses section in this page. You’ll see a few settings that look like this -

Legal/Business Name
If your business’s registered name is not the same as that of your store and you need to show this in your invoice, enter your business name here. This business name will be shown right underneath your store name in the ‘Supplier Address’.
Address Line 1, Address Line 2, City, Province, Country & Zip Code
In most cases, these details will be automatically filled from your Shopify store’s details. If you’d like to change your address, enter the details in any of these provided fields to update them.
Email Address
To change your email address shown to customers in your invoice, enter the new/updated email address here.
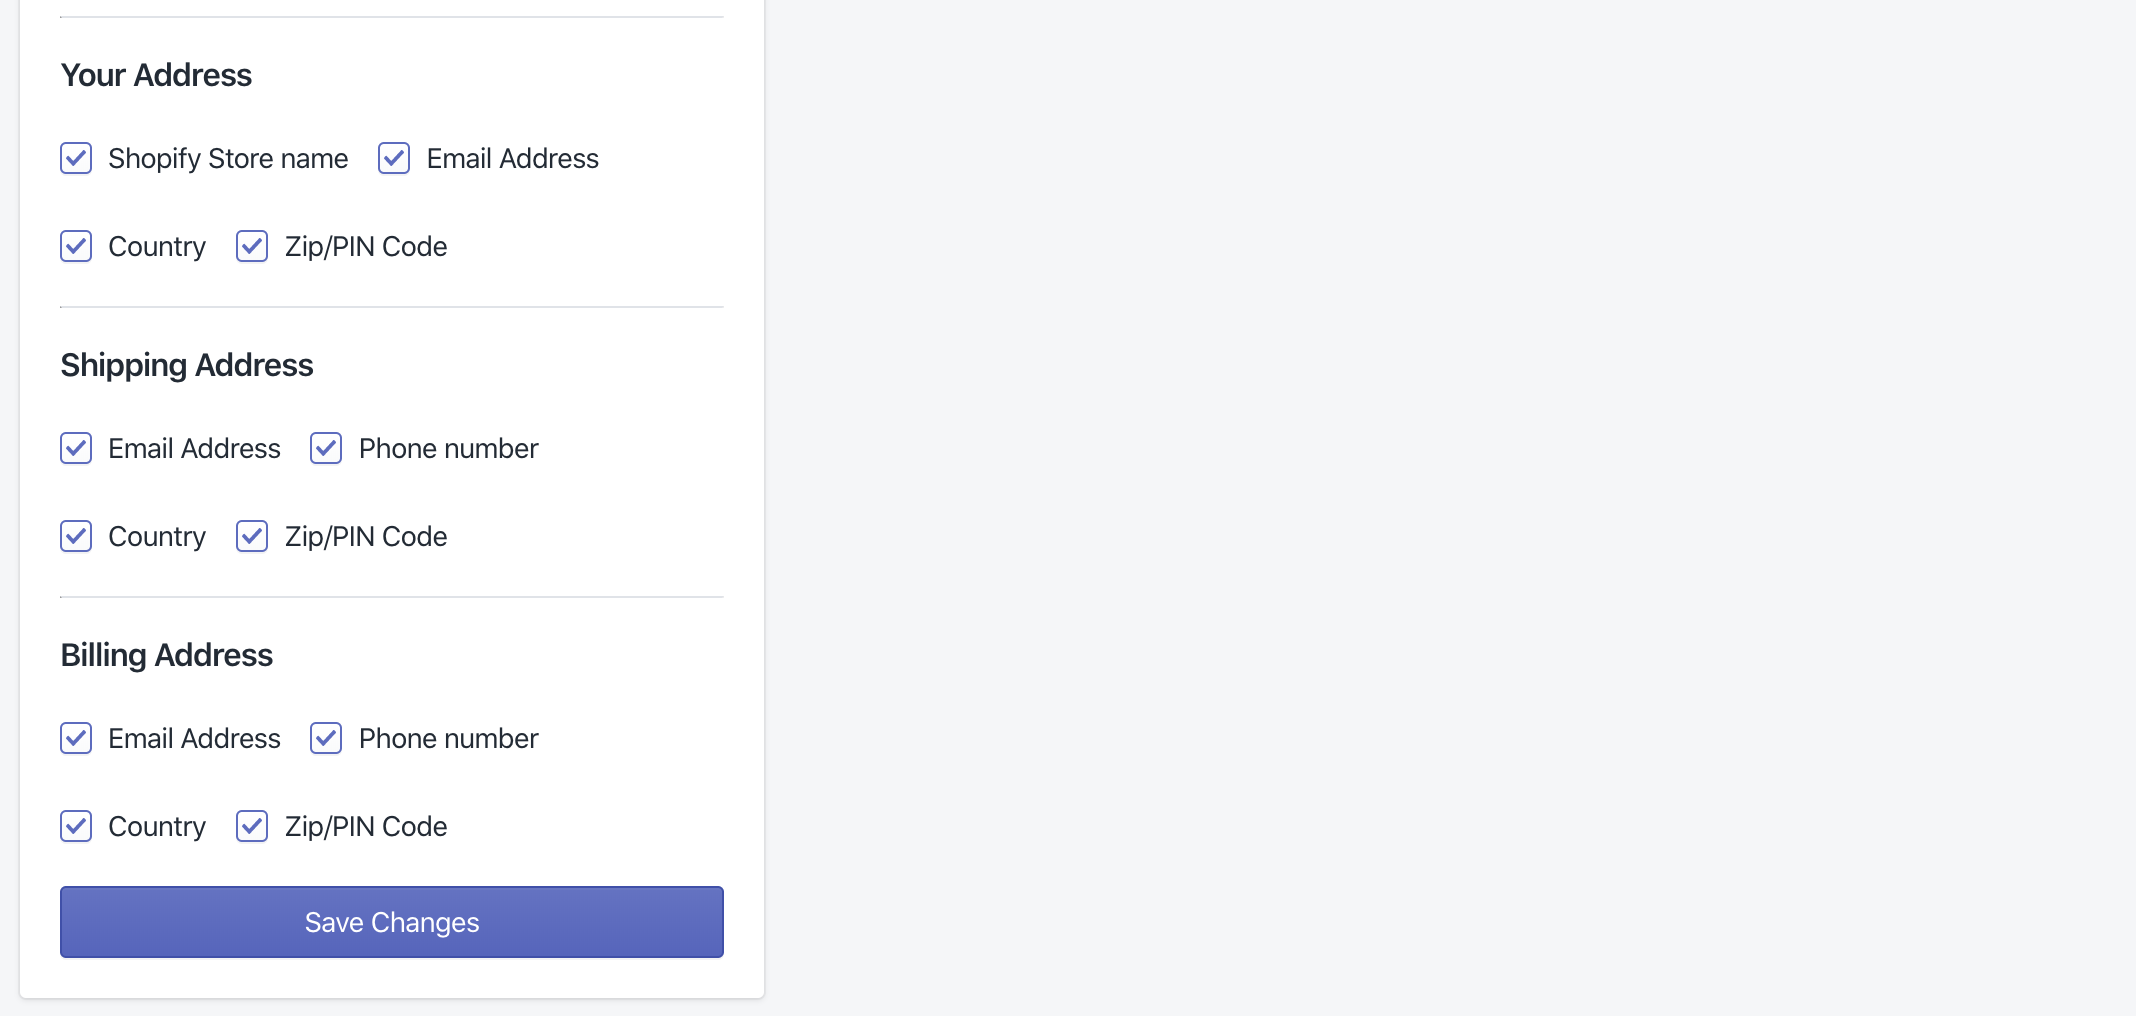
To remove your email address from the invoice, scroll below till you find the “Email Address” checkbox in the “Your Address” subsection and uncheck the box.
Phone number
Enter your new/updated phone number in this field.
To remove your phone number from the invoice, remove all the text in this field. The phone number will be automatically removed from your invoice.

You can also choose to hide specific details of the address or your entire store address from the invoice.
To hide specific details of your address
In this same section, scroll down till you find the “Your Address” subsection. Uncheck the boxes for details that you’d not like to show in the invoice.
To hide specific details of your address
In this same section, scroll down till you find the “Addresses in Invoice” subsection. Uncheck the box labelled “Your Address”
Make sure to click ‘Save Changes’ after you’re done! Your existing invoices will be automatically updated to include the changes you made here the next time it’s printed, sent or downloaded. :)